![]()
Losing your phone means more than losing a device. It means losing photos, documents, app data, and sometimes years of information you never thought to save elsewhere. That risk alone makes having a backup plan worth thinking about seriously in 2026.
The questions most people run into are practical ones. Do you back up everything on your phone, or just the files and data that actually matter to you?

Do you store it in the cloud, keep it local, or both? Each option comes with trade-offs, and the right answer depends on how you use your phone and what you can’t afford to lose.
You may also like: Why the Google Pixel 10a Makes Sense Despite Minimal Upgrades Over Pixel 9a
This guide walks you through the main approaches available today, from full system backups to cloud storage and local options, so you know exactly what to do before something goes wrong.
How to Back Up Your Phone on an OS-level Backups
A full phone backup covers everything, such as apps, photos, videos, text messages, call history, and documents. If you want all of that saved in one place, your choices narrow down pretty quickly.
For iPhone users, iCloud is the simplest option. Apple built it directly into iOS, so it handles the entire backup process without requiring you to install anything extra or connect to a computer.
It saves your app layout, widget placement, and all your personal data, which means when you switch to a new iPhone or need to restore an older backup, you pick up almost exactly where you left off.
Setting it up takes less than a minute. Go to Settings, tap your Apple Account, then iCloud, then iCloud Backup, and make sure “Back Up This Phone” is turned on. If you want to run a backup immediately instead of waiting for the automatic one, tap “Back Up Now” from that same screen.
For Android, it’s a different story. Getting a true full-system backup on Android is more complicated, and in most cases, you won’t get the same all-in-one experience that iPhone users have with iCloud.
Google does offer a backup option during the initial setup of a new Android phone, and it’s worth turning on. It covers the basics, such as apps, photos, videos, and contacts. But it stops short of saving everything.
You may also like: Nothing Phone 4a and 4a Pro Specs and Pricing Leak Ahead of March 5 Launch
Things like your home screen layout don’t get included, so if you restore from a Google backup, you’ll still need to rearrange your apps and widgets manually. It’s a partial backup, not a complete snapshot of your phone, as iCloud does on iPhone.
It’s still worth using, though. A partial backup beats no backup at all, especially for your photos, contacts, and apps. To turn it on, go to Settings, then Google, then All Services, then Backup and Restore. From there, tap “Back Up Now” to save everything the system supports.
How to Back Up Your Phone on a Cloud-based backup
Not everyone needs a full phone backup. If you only want to protect specific things, like your photos, videos, or important documents, cloud storage services are the more practical route.
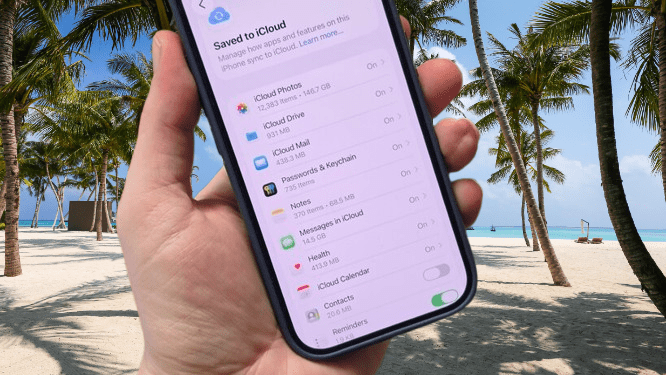
Apple and Google both offer the simplest starting point, depending on which phone you use. On iPhone, iCloud lets you back up specific data types rather than your entire device, so you can choose to save just your photos and videos without backing up everything else.
To control exactly what gets saved, go to Settings, then Apple Account, then iCloud, then iCloud Backup. From there, you can toggle individual data types on or off. Anything you choose to save also becomes accessible through the iCloud website so that you can view or download your photos and files from any browser, not just your phone.
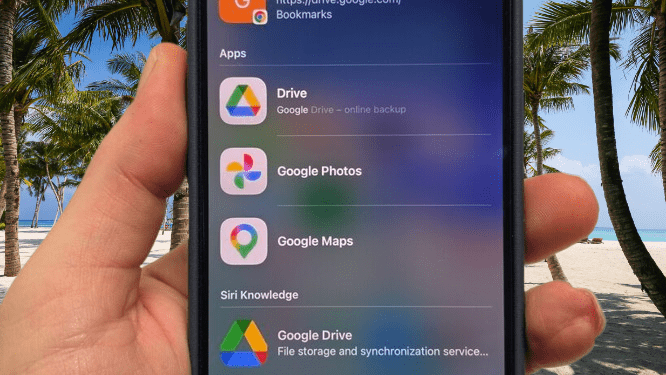
On Android, Google Photos is the easiest way to keep your photos and videos backed up. It comes pre-installed as the default gallery app on most Android phones, so there’s no setup required to get started. Your photos sync to the cloud automatically once you turn on backup in the app settings.
Google Drive handles everything else. If you have spreadsheets, PDFs, Word documents, or any files you want stored separately from your photo library, Drive is where they go. It’s built into Android at the system level, so saving files directly to Drive is simple from most apps without needing to jump through extra steps.
Apple and Google aren’t your only options. Amazon Photos is worth considering if photos are your main priority, and Dropbox works well if you want a single place to store a mix of file types without being tied to either ecosystem.
You may also like: Samsung Galaxy Z TriFold US Release Date: $2,899 Price, January 30 Launch Date
The trade-off with any cloud storage service, whether it’s first-party or third-party, comes down to cost.
Most services give you a small amount of free storage to start, but it rarely lasts long if you’re backing up photos, videos, and documents regularly. Once you hit the limit, you’ll need to pay to keep things running.
Pricing varies quite a bit between services. Paying annually usually works out cheaper per month than rolling over on a monthly plan, but it does mean spending a larger amount upfront. It’s worth comparing both options before committing, especially if you’re not sure how much storage you actually need.
How to Back Up Your Phone on a Local Device
Cloud storage isn’t the only option. You can also back up your phone directly to a computer or a NAS drive on your home network, keeping everything local without relying on a monthly subscription.
Here again, iPhone has the cleaner solution. Apple built local backup support directly into iOS, so the process is simple and doesn’t require any third-party software to get started.

Connect your iPhone to your computer with a cable, then open Finder on a Mac or the Apple Devices app on Windows. Follow the on-screen steps, and it will create a complete local backup stored directly on your machine.
If you want an extra layer of protection, you can also locate the backup file in your file system and copy it to a separate drive or folder.
You may also like: Samsung One UI 8.5 Beta Hits Galaxy Z Fold 7 Now
Android doesn’t have a direct equivalent. Google hasn’t built a local backup tool into Android the way Apple has with iOS. There are third-party apps that claim to fill that gap, but most charge a significant fee and come with questions around privacy and data handling that are worth thinking about before you hand over access to your files.
What you can do is connect your Android phone to a computer and manually drag and drop your photos, videos, and documents across. It works, but it’s a manual process. You decide what gets copied and when, and anything you forget stays only on your phone.
A NAS drive is another route worth considering, particularly if you want to stop paying for cloud storage. Brands like Ugreen make NAS devices that come with their own apps for backing up phone data. You connect the drive to your home network, and it sits in the background, handling backups without much input from you.
It won’t save your entire phone the way iCloud does, but it gives you a place to store photos, videos, and documents that you can access from any device on your network. You pay once for the hardware rather than every month for storage, which adds up to real savings over time.